The Project: James' 18th Birthday Cake
The Theme: Computers
Ingredients:
For the cake:
36oz Self Raising Flour
36oz Sugar
36oz Butter
18 eggs
For the middle and first layer:
Several boxes of icing sugar
Butter
Cake crumbs (for the first layer only)
For the decoration:
5 and 1/2 packs of black icing
2 Cadbury Wispas
4 Nestle Milky Bars
Silver Paint
Edible Glue
White icing
Liquorice Laces
This cake had 4 elements to it, as all computers do; a tower, mouse, keyboard and monitor. There's usually a couple of things that make me nervous about certain cake projects and with this particular cake, I had one main worry; the monitor. An old fashioned monitor would have been no problem at all, however this is 2013 and flat screens are the norm. This is where things got creative, chocolate was the only answer.
I started with the monitor, I needed time for it to set and it was the piece that was worrying me the most.
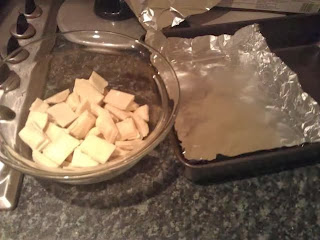
I melted 4 bars of Milky Bar (the big kind), in a bowl over a saucepan. Whilst that was slowly melting and smelling more and more delicious by the second, I lined the tin with foil and partitioned it as my tin was too big. When the chocolate was melted, I poured it into my lined tin and let it cool, then popped it in the fridge
I only actually have one rectangular tin, so I could not start the cake baking until it had set.
On with the baking. I made 3 tins of cake, estimating that I would need three layers for the tower, one layer for the keyboard, some for the mouse and some for the butter icing mix that holds it together (Once again, I still need a bigger mixing bowl) There was a lot of sponge cutting involved but it was the least wasteful option.
Now that I had my layers baked and iced. I mixed up some butter icing and crumbled some crumbs into it and spread it across the sponge that made up my keyboard. This mix sets and gives the cake an even and smoother finish. I did the same to the mouse and then to the tower and let them set.
Next, I rolled out some black icing and covered the tower, monitor and keyboard.
I covered the mouse, added two buttons and the middle scroll bar.
This is where the tricky decoration begins. I had to meticulously measure out the icing that was going to be used for the keys on the keyboard, position them to check it would fit, and then stick them down.
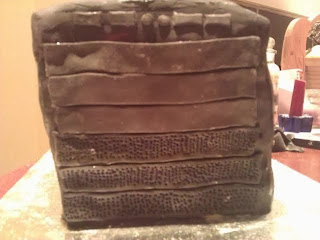
Thankfully, there was very little detail work to be done on the tower. I added the two side vents first by rolling and cutting two squares of black icing. I then used one of my icing tools to create little holes, about halfway through the second one was when I started to lose the will to carry on slightly, but I persevered and managed to finish them.
After they were safely attached I started work on the front of the tower. I made two buttons, two usb hubs three plain panels and...three more panels with holes in (marvellous).
I then added detail to the buttons, jacks and usb ports by painting them silver
Having completed that, I realised (with the help of Gavin who actually pointed it out), that there should also be a fan on top. I had not accounted for that in my planning. A minor panic and a eureka moment later, I knew how it would work. Create the circle and the blades inside a square and add strips over the top.
Now that the monitor chocolate was perfectly set and chilled, it was time to ice the edges and make the stands. I rolled out some more black icing and covered the edges
The final touch to the monitor was to pipe Happy 18th Birthday James.
Rather stupidly, I left the most difficult part until last; the piping of the keys, by this time it was getting late, and I very much regretted leaving it until last. However, I think it turned out quite well after a couple of attempts at a few of the letters and after I had developed a new hatred for the number 7 key with the "&" symbol
All that was left to do was to get it to the restaurant in one piece, stand the monitor up and add the cables. The stand didn't quite work, whether that was because it would not stick to the board or because the chocolate was still too cold, thankfully it was suggested that we use the menu stand behind it, which worked nicely. Project complete!
Total Time Spent: 11 Hours
Useful Tips Gained: avoid panicking, the answer will come to you
Kitchen Items to Purchase: Bigger mixing bowls, more rectangular/square tins
Items added to Amazon Wishlist: None
Miscellaneous items wished for: A kitchen elf to help clean up


Amazing cake, you've outdone yourself again! And although I haven't got to taste it yet, even the trimmings tasted amazing!
ReplyDeleteI do have one objection though.... you totally did have a kitchen elf to help clean up. His name was Gavin! :D xxxxxx